
18 DIY Dupe Decor Ideas for Renters Who Love the West Elm Look
This platform is proudly ad-free! To keep it that way and support our efforts, some posts may contain affiliate links. These links come at no extra cost to you, but they help us grow and continue providing valuable content. Thank you for your understanding and support!
High-end retail catalogs offer a distinct look many people want. Achieving that style on a rental budget is a common challenge.
West Elm’s sculptural ceramics and warm wood tones are expensive. Renters also face restrictions on permanent changes.
This list delivers DIY dupe decor ideas for that West Elm look. Every project respects rental rules and uses accessible materials.
Most ideas cost under fifty dollars and require only basic crafting skills. The textile projects involve no-sew techniques anyone can master.
You will find a specific plan for a painted rattan look-alike headboard. It requires minimal tools and creates a major focal point.
1. No-Drill Pivot Mirror for Renters
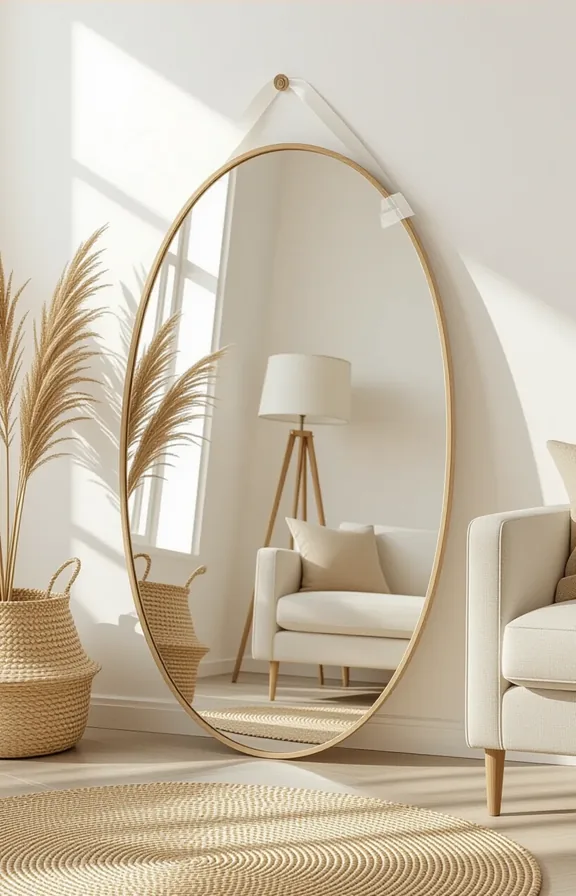
A large round mirror creates instant depth in a rental bedroom. Place it leaning casually against your largest wall.
This look replicates a luxury pivot mirror without the installation. It adds a sculptural, designer element with zero holes.
Buy a large, thin mirror from a home goods store. Choose a frame in natural rattan or simple black metal.
Lean it against the wall behind a dresser or console. No tools are needed for this setup. No damage occurs to your walls.
Use felt pads on the bottom corners for safety. This prevents any sliding and protects your baseboard.
The angle creates interesting light play throughout the day. Your small room will feel much more open and bright.
Pro Tip: Prop a heavy, decorative book behind the top edge. This gives you more control over the final leaning angle.
You Might Also Like
2. Budget Rattan Headboard Dupe
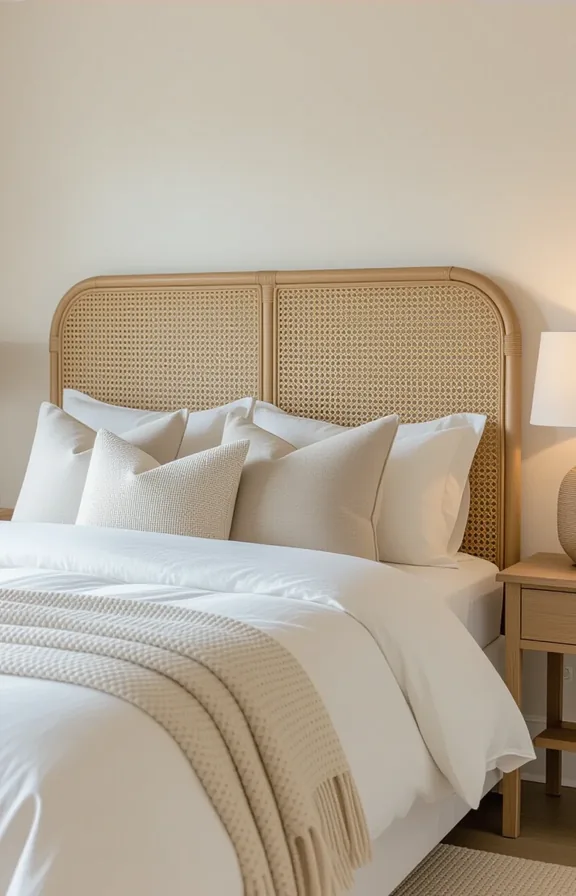
A natural rattan headboard adds instant personality to a small bedroom. This version uses a leaner profile for renters.
Find a single rattan room divider or panel. Lean it securely against the wall behind your bed. No tools are needed and it causes zero wall damage.
Use the bed frame itself to anchor it in place. Wedge the panel’s bottom edge just behind the mattress. This prevents any accidental tipping.
Place a few heavy books or a sandbag behind the panel’s base. This adds stability without any permanent fixtures. It works perfectly for a studio apartment.
Style the bed with simple white linen sheets and a textured throw. This lets the rattan remain the clear focal point. The look is clean and considered.
Pro Tip: Spray a new rattan panel lightly with water. Let it dry in the sun for a few hours. This gives it a naturally weathered, vintage appearance.
3. Removable Tile-Look Backsplash
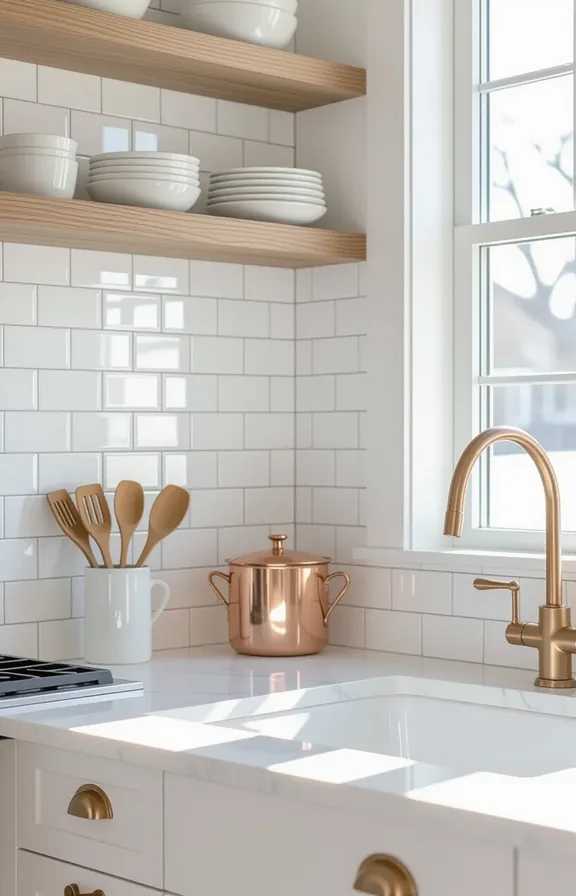
Your rental kitchen likely needs visual weight behind the sink. A classic subway tile backsplash provides it. The high price and permanent glue are major obstacles.
Use large format peel-and-stick panels instead of small individual tiles. They apply in minutes for a seamless look. No tools are needed for this project.
Clean your wall thoroughly with rubbing alcohol first. Measure carefully and cut the panel with sharp scissors. Start applying from one corner and smooth outward.
Press out any air bubbles with a plastic card. The adhesive holds well for years of use. It also peels off cleanly when you move out.
A white marble or grey concrete finish reads as modern. It mimics expensive stone or ceramic slab backsplashes. This creates a high-end focal point instantly.
Pro Tip: Use a hair dryer on low heat while removing old panels. The warmth softens the adhesive for a cleaner, damage-free peel off your rental walls.
4. Command Strip Curtain Rods
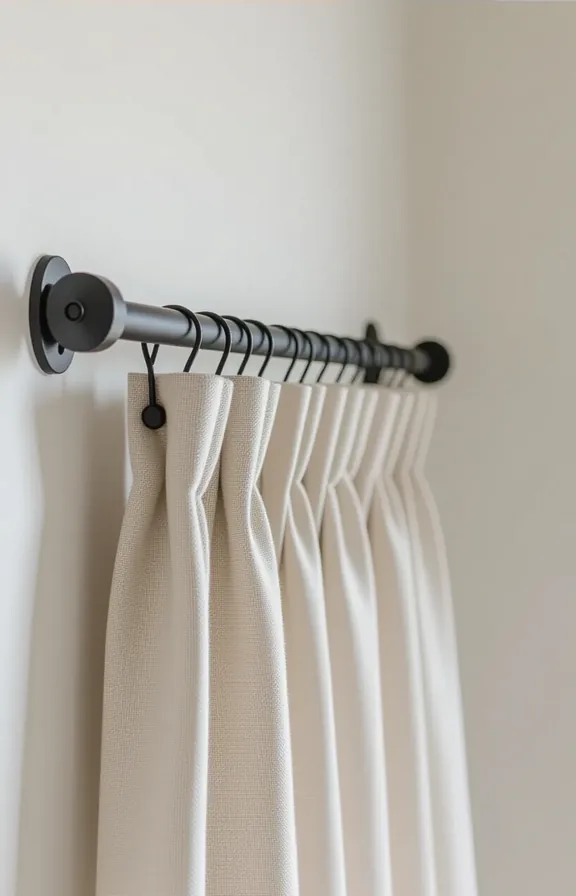
A simple upgrade makes your rental’s windows look expensive. Use heavy-duty adhesive strips for the rod brackets.
They hold more weight than you think. No tools are needed for this project.
You can choose a slim black metal rod for a modern look. Finish with linen-look curtains from a discount store.
This method leaves absolutely no damage to the walls. It is a perfect solution for temporary spaces.
Level the rod by measuring from the ceiling, not the floor. This trick works better in older apartments.
Pro Tip: Mount the brackets, then wait a full hour. Let the adhesive bond before hanging the rod and curtains.
5. Peel-and-Stick Wood Planks
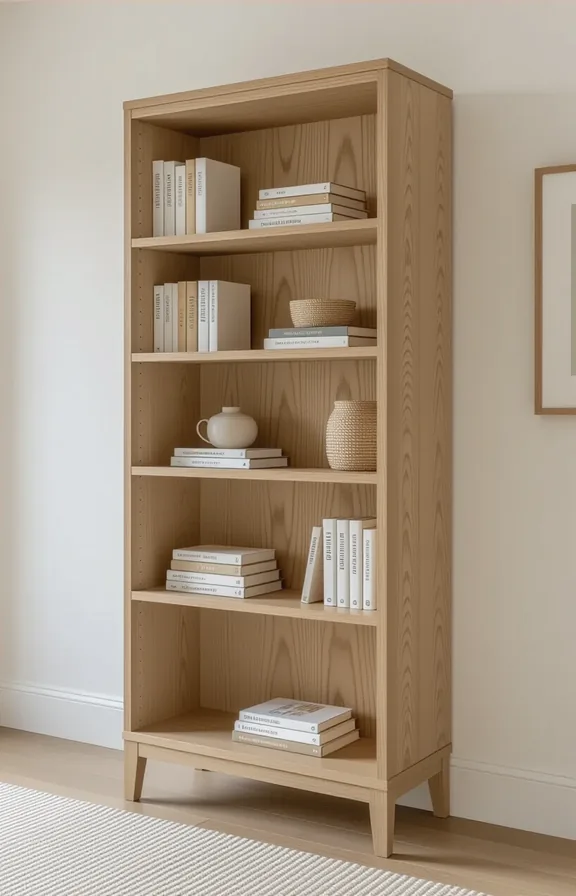
A tall freestanding bookshelf often looks cheap in a rental. Cover its flat sides in peel-and-stick planks. This creates an instant custom-built look for your West Elm style.
Use them horizontally on a bland kitchen backsplash or vertically in a thin entryway. No tools needed. This causes no damage to your existing walls.
Choose planks with a realistic grain and matte finish. Lighter oak or warm walnut tones work best. They pair beautifully with your linen bedding and cream ceramics.
Wipe them down with a damp cloth before you apply. This removes all dust for the strongest hold. Start from the top corner for perfect alignment.
Pro Tip: For a clean finish, also cover the shelf’s top. Cut a plank to size with sharp scissors. This hides the raw particle board completely.
6. Freestanding Slat Room Divider
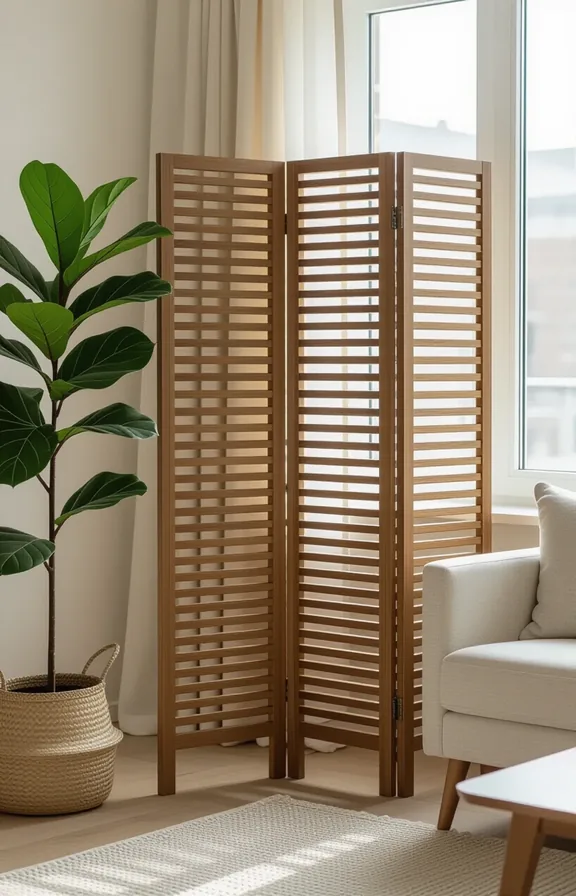
Narrow, vertical planks create an instant sense of privacy. Use this to define a small home office corner. It needs no wall mounting for a quick visual break.
Stain inexpensive furring strips from a hardware store. Stack and connect them with basic metal brackets. Your total cost stays under fifty dollars.
Lean it gently against a wall for true non-permanence. The piece adds texture without painting or drilling. No tools needed. No damage to walls.
Place it behind your sofa to zone an open layout. It subtly separates your living area from a dining space. This trick works perfectly in studio apartments.
Use the divider to hide clutter or an ugly radiator. The slats still allow light to pass through beautifully. Your room feels organized but not closed off.
Pro Tip: Buy one pack of matching stain for all your slats. Test it on a scrap piece first for the perfect tone.
7. Leaning Ladder Style Shelf
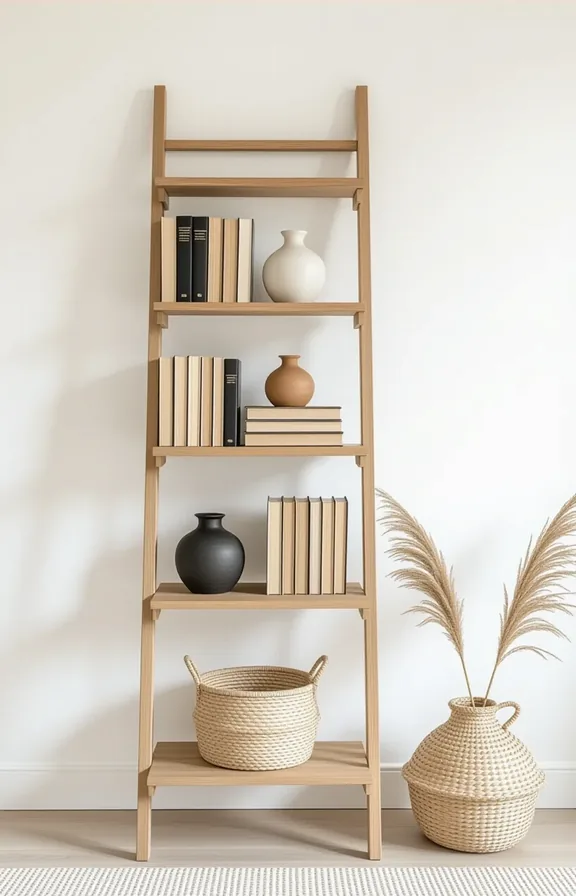
Leaning furniture creates style without permanent fixtures. It offers the West Elm aesthetic for a fraction of the cost.
This design fits perfectly in narrow rental apartment corners. No tools are needed and there is zero wall damage.
Use it to hold books, trailing plants, or small baskets. The slanted rungs create lovely asymmetrical displays instantly.
Find a tall, thin wood ladder at a thrift store or hardware outlet. Sand it lightly and apply a coat of walnut stain for warmth.
Place it securely in a living room corner or beside a desk. Lean your heaviest items on the lower, wider rungs for safety.
Pro Tip: Use adhesive felt pads on the ladder’s top corners. This prevents any scuff marks on your rental walls.
8. Renter-Friendly Accent Lighting
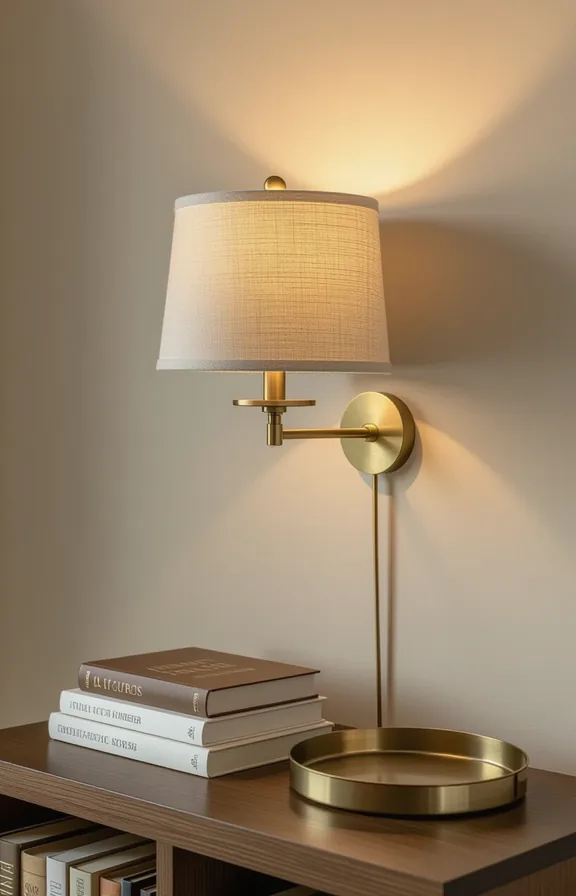
West Elm’s wall sconces look great. You probably cannot drill into your walls.
Plug-in sconces solve this problem beautifully. Look for a model with an articulating arm.
Place it behind your living room sofa. It can also work on a console table.
Choose a fabric shade for softer, warmer light. Linen or paper both work well.
This casts a beautiful glow on your wall. No tools are needed at all.
No damage is done to your walls. You can take it with you.
Pro Tip: Run the cord down behind furniture. Use a small cable clip for a clean look.
9. DIY Woven Wall Hanging

A large textured piece instantly upgrades a plain rental living room. This project costs a fraction of the designer look.
You only need cotton yarn and a simple dowel rod from the craft store. The process involves basic weaving knots and braids.
No tools are needed for this project. It also leaves no damage to walls when you hang it.
Use two small Command hooks over your sofa or bed. The woven texture adds softness and major visual weight.
Pro Tip: Drape a second, thinner dowel from the main one with twine. This creates a modern, layered look without more weaving.
10. Removable Pendant Light Dupe
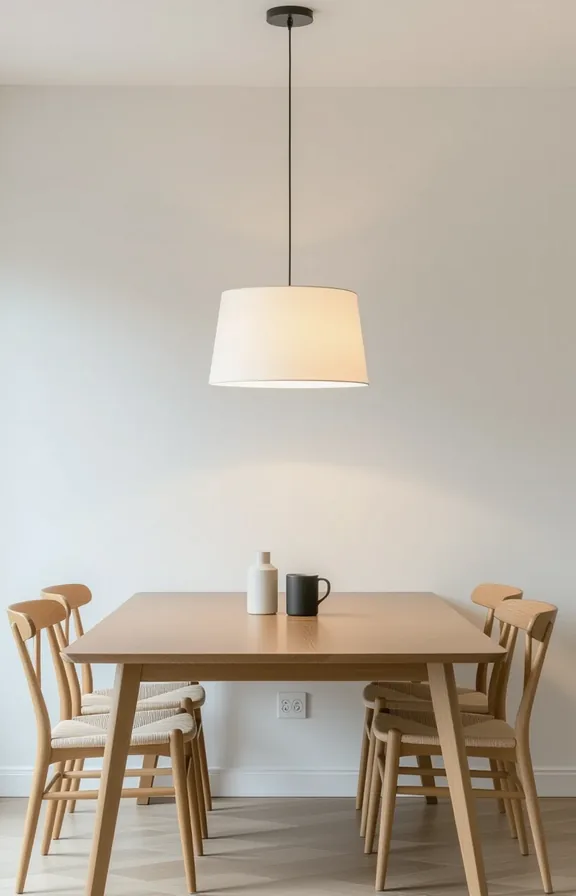
Plug-in pendant lights are a renter’s best friend. They offer that sculptural lighting upgrade you crave.
Many are cordless and rechargeable for total flexibility. This solves your no-drilling limitation instantly.
Choose a simple white paper or rattan shade for the classic look. Hang it over a side table or reading nook.
Use a strong adhesive hook on the ceiling for support. The cord drapes neatly down to your nearest outlet.
No tools are needed for this entire project. You will cause no damage to walls or ceilings.
This creates a focal point without permanent wiring. Your security deposit stays perfectly safe.
Pro Tip: Use two pushpins per item to keep everything perfectly straight. This prevents a cluttered look.
11. Floating Shelf Dupe for Renters
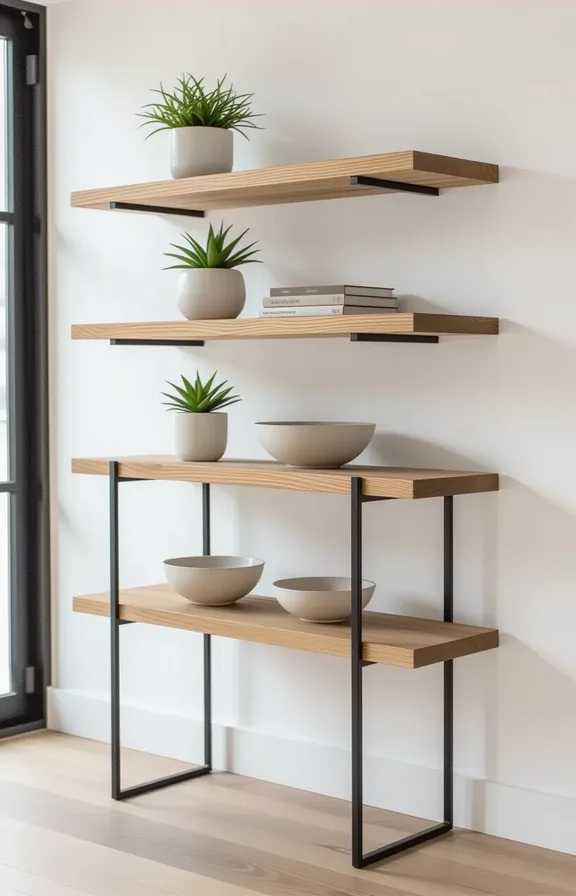
A West Elm shelf look costs less than you think. Many renters achieve it with minimal effort.
Use a simple slab of stained wood. Prop it on two identical metal brackets.
Mount the brackets using strong removable adhesive strips. No tools needed for this step.
The system leaves no drill holes in your walls. It handles standard decor weight perfectly.
Place it above a small sofa or your bed. The shelf instantly creates a focal point.
Pro Tip: Choose a wood stain several shades darker than your floor. This contrast reads as intentional and expensive.
12. Budget-Friendly Velvet Pillows
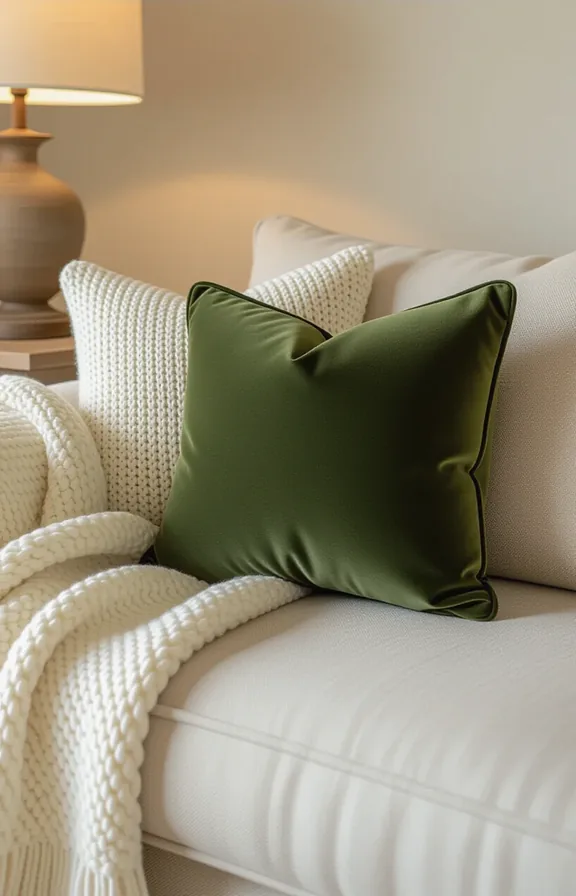
Deep olive or mustard velvet feels expensive. This texture works on any rental sofa.
Buy two plain pillow covers online. Target and IKEA have great budget options. Fill them with cheap stuffing from a craft store.
Pile them on your bed or living room floor. This adds layered texture instantly. No tools are needed for this simple swap.
Mix velvet pillows with linen or cotton ones. The contrast prevents a dated look. Your space will feel designer on a budget.
Pro Tip: Use safety pins inside the covers to secure the corners. This creates a plush, knife-edge shape without any sewing.
13. Thrifted Wooden Coffee Table
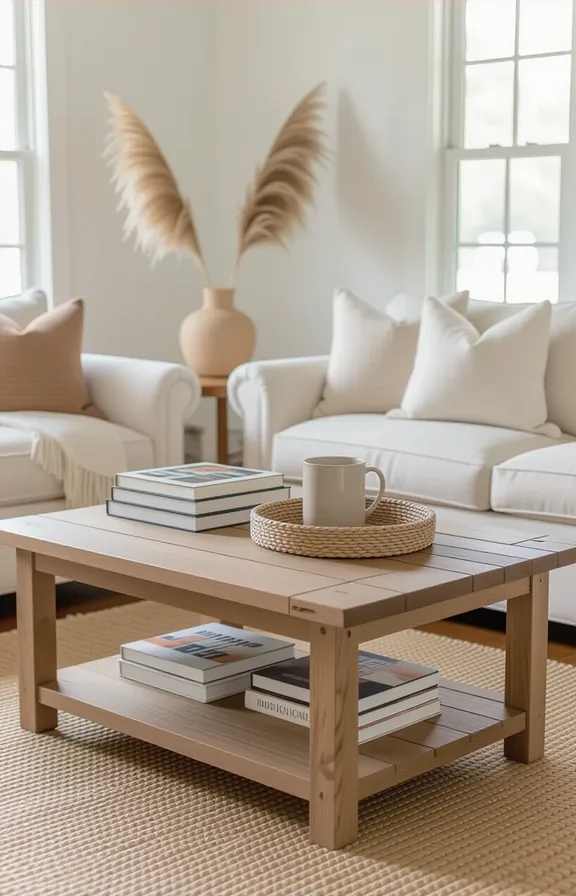
A solid secondhand table instantly grounds a living room. This is key for a non-drilling renter on a budget.
Look for a sturdy rectangular wood table at a local thrift store. Place it directly on your neutral rental carpet or laminate.
Sand the surface lightly for a smooth finish. Then apply a simple matte water-based sealant to protect it.
Keep styling minimal to avoid a cluttered look in small spaces. A single stack of art books and a small tray works.
You require no special tools for this basic update. It leaves your rental deposit completely intact.
Pro Tip: Search for “dining table” not “coffee table” in thrift listings. They are often cheaper and the right low height.
14. Renter-Safe Accent Chair
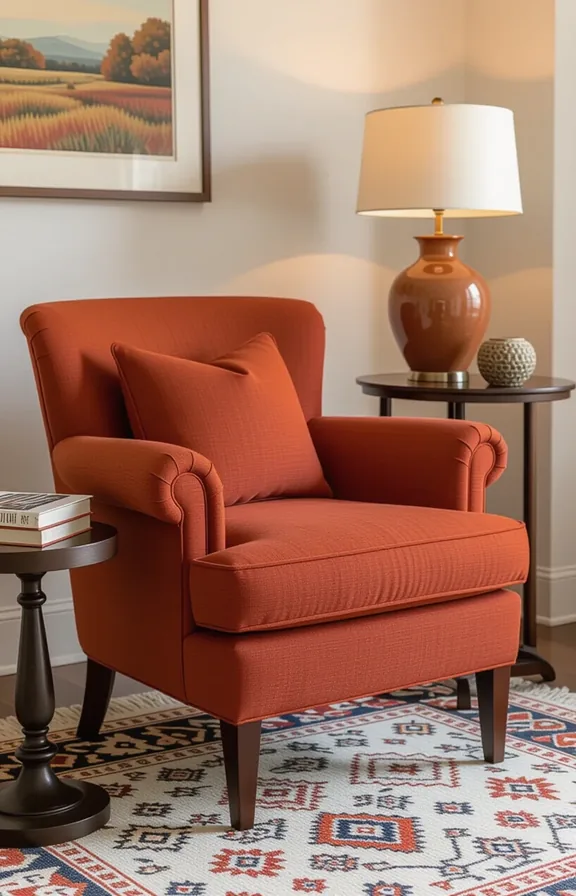
A neutral linen chair fits most rental living rooms. Its compact frame looks intentional in a small corner.
Place it near a window for natural light. This creates a quiet reading nook instantly.
Find a fully assembled chair online or at a discount store. Look for a linen blend fabric for durability.
Drape a chunky cream knit throw over one arm. Add one round lumbar pillow for comfort.
This setup requires no tools at all. There is no wall damage from installation.
Pro Tip: Prop a large, framed poster behind the chair instead of hanging it. This gives a “designed” look without any holes.
15. Peel-and-Stick Marble Contact Paper
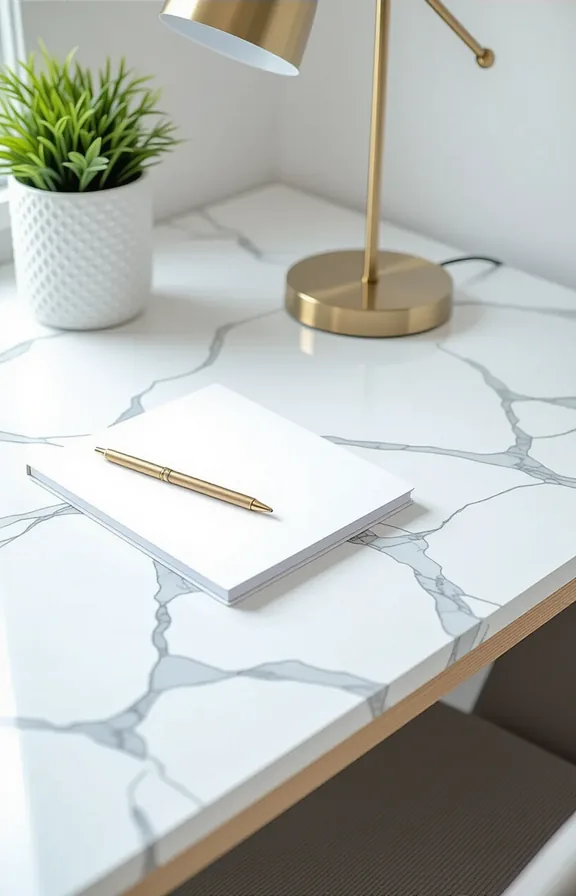
A plain laminate bathroom vanity looks instantly expensive with this paper. Cover your whole kitchen countertop for a major upgrade.
The paper is budget-friendly and removes cleanly from most surfaces. This is a perfect project for your strict rental agreement.
You need a metal ruler and a sharp craft knife for clean cuts. Apply it slowly to avoid frustrating air bubbles underneath.
Focus on flat surfaces like desk tops and kitchen islands first. The result mimics real stone without the permanent cost.
Pro Tip: Buy a sample roll first. Test it on a hidden spot to check adhesion and removal.
16. Canvas Drop Cloth Curtains
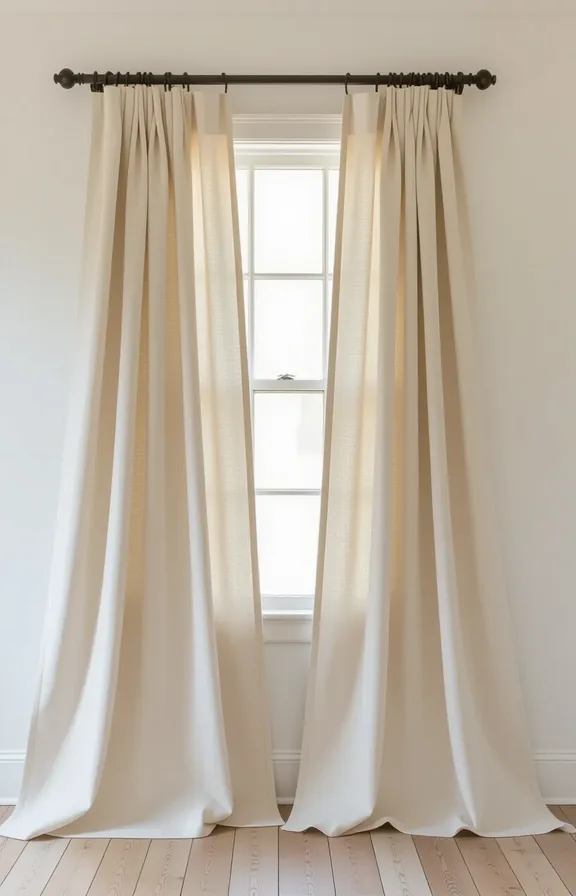
Canvas drop cloths hang with a beautiful, heavy drape. They look more expensive than most fabric by the yard.
Renters love this project for its zero-damage installation. Use adjustable tension rods inside your window frames.
Pre-wash the cloth to soften it and remove sizing. Then simply cut panels to your desired curtain length.
Hem the edges with fabric glue or iron-on tape. No sewing machine is required for this project.
Pro Tip: Clip-on curtain rings create instant pleats without sewing. They also make opening the curtains much easier daily.
17. Freestanding Entryway Console
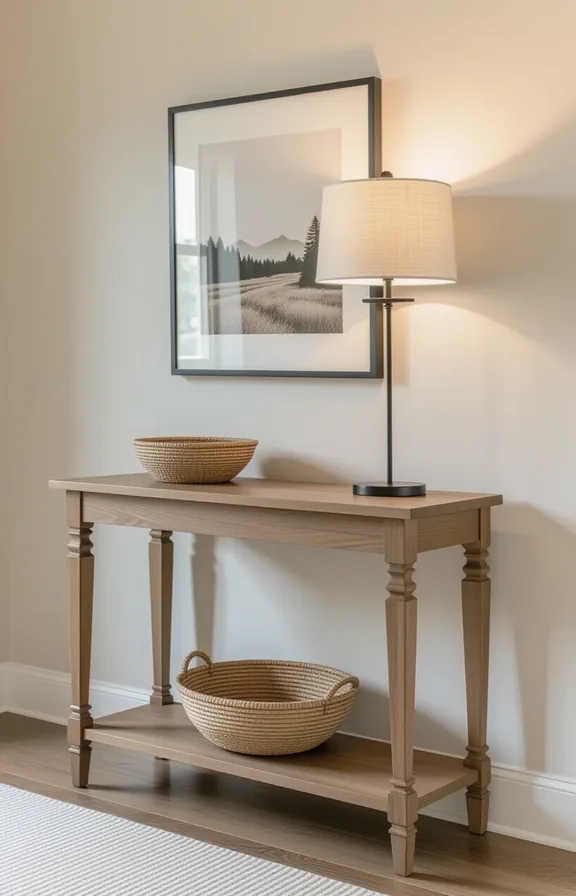
Slim console tables anchor any rental entryway instantly. This layout works for small spaces and tight budgets. You create a landing zone without major investment.
The style uses minimal materials and avoids drilling. Try a narrow, ready-made table from a secondhand shop. Add a tall vase and a single tray on top.
A shallow basket fits perfectly underneath for shoes. Choose a woven texture to add softness. It corrals daily clutter in a purposeful way.
No tools are needed for this setup. No damage happens to your walls. This is a completely reversible entryway moment.
Pro Tip: Use felt pads on all furniture legs. They protect floors and allow for easy sliding.
18. Budget Cane Cabinet Doors
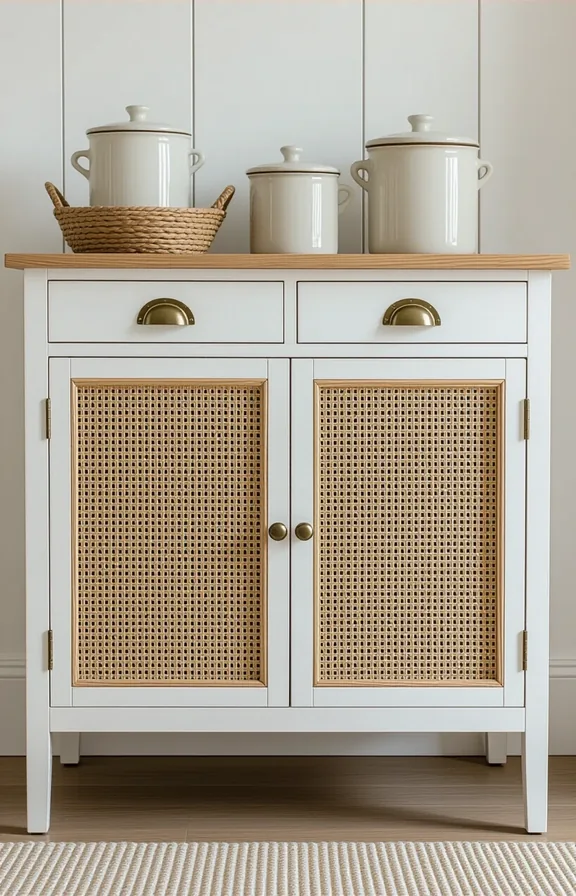
Your apartment stock cabinetry looks bland and generic. This simple upgrade adds high-end texture for under twenty dollars.
The project needs only cane webbing and a little trim. Mount it directly over the existing cabinet fronts with sticky tape.
Focus on just two lower doors for a focal point. This keeps the project small, manageable, and incredibly affordable.
The entire process requires no power tools and creates no damage. Your rental deposit stays perfectly safe and secure.
Use a small staple gun or strong glue for the webbing. Then frame the edges with simple quarter-round wooden trim.
Finish the new panel with two coats of white spray paint. It blends the materials into a single, cohesive unit.
Pro Tip: Buy pre-stained trim to skip a painting step. Just cut, glue, and press it over the webbing edges.
Start with the textured throw pillow covers. This project needs only a sewing machine and scrap fabric. It instantly changes a sofa’s entire feel without major commitment.
The DIY slatted bed frame uses basic lumber from any hardware store. Pair it with the pillow covers for a coordinated look. Both projects share a clean, modern material palette.
You now have a clear two-step plan for your bedroom refresh. These affordable DIYs build a strong foundation. Save this article for your next weekend project.