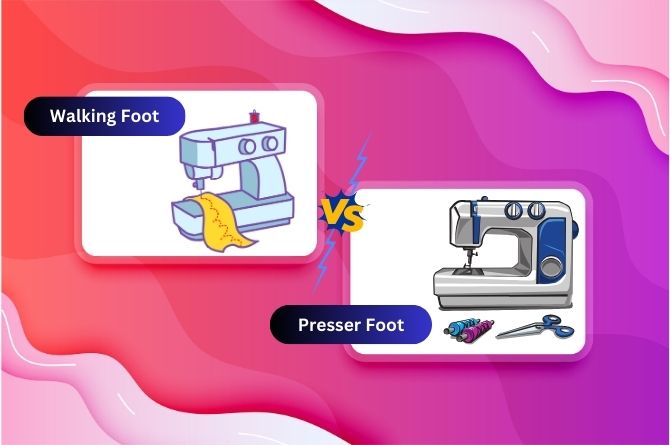
When it comes to sewing, the choice of foot can significantly impact your project’s outcome. Two essential tools in the sewing world are the walking foot and the presser foot. While both serve unique functions, understanding their differences can enhance your sewing experience.
In this comprehensive guide, we’ll delve into the details of walking feet and presser feet, exploring their uses, advantages, and how to choose the right one for your needs.
Topics Analyzed
What is a Presser Foot?
The presser foot is a fundamental accessory in sewing machines. It holds the fabric down against the feed dogs, ensuring smooth and even stitching. Presser feet come in various designs, each tailored for specific sewing techniques and fabrics.
For instance, the zigzag foot allows for zigzag stitching, while the blind hem foot is ideal for hemming without visible stitches.
Types of Presser Foot
1. Standard Presser Foot
The standard presser foot is the most basic and commonly used foot. It’s ideal for everyday sewing tasks such as sewing seams, hemming, and basic stitching. This foot provides consistent pressure on the fabric, allowing for smooth and even stitching.
2. Zigzag Foot
The zigzag foot is designed specifically for zigzag stitches and decorative stitching. It has a wider opening to accommodate the side-to-side movement of the needle, making it suitable for creating decorative patterns, appliqué, and sewing stretch fabrics.
3. Walking Foot
The walking foot is used for feeding multiple layers of fabric evenly, making it ideal for quilting and sewing through thick or slippery materials. It features additional feed dogs on the top that work in conjunction with the machine’s feed dogs to prevent fabric shifting and puckering.
4. Blind Hem Foot
The blind hem foot is used for creating invisible hems on garments. It features a guide that helps fold the fabric in place, allowing for a clean, professional finish without visible stitches. This foot is especially useful for hemming trousers, skirts, and dresses.
5. Buttonhole Foot
The buttonhole foot is designed to sew buttonholes of various sizes. It typically includes a sliding guide that ensures the buttonhole is evenly stitched and aligned. Some buttonhole feet also have built-in markings for adjusting the size of the buttonhole.
6. Edgestitch Foot
The edgestitch foot, also known as the edge guide foot, is used for sewing precise, evenly spaced stitches along the edge of the fabric. It features a guide that helps keep the fabric aligned and ensures consistent seam allowances, making it ideal for topstitching and finishing edges.
7. Rolled Hem Foot
The rolled hem foot is designed to create narrow, rolled hems on lightweight fabrics. It features a small, curved plate that rolls the fabric edge as it’s stitched, giving a neat and professional finish to hems on garments like scarves, tablecloths, and blouses.
8. Overcasting Foot
The overcasting foot is used for finishing raw edges to prevent fraying. It works with the sewing machine’s overcast stitches to create a neat, zigzag stitch along the edge of the fabric. This foot is especially useful for sewing with fabrics that tend to unravel, such as knits and woven materials.
9. Darning Foot
The darning foot, or free-motion foot, is designed for free-motion quilting and embroidery. It allows the needle to move freely in any direction, making it ideal for creating intricate, detailed stitching and designs on your fabric.
10. Quarter Inch Foot
The quarter inch foot is used for precise seam allowances, typically 1/4 inch. It’s commonly used in quilting for piecing together blocks and strips with consistent seam allowances. The foot often includes a guide or edge that helps maintain accurate measurements.
Advantages of Using a Presser Foot
Consistent Stitching: Ensures even and uniform stitching by holding the fabric securely against the feed dogs.
Enhanced Fabric Control: Provides better control and accuracy for various fabric types and sewing tasks.
Improved Accuracy: Enhances precision for specific tasks, such as seam allowances and decorative stitches.
Specialized Functions: Allows for professional-quality results in tasks like buttonholes, raw edge finishing, and decorative stitching.
Time Efficiency: Streamlines the sewing process and reduces time spent on adjustments and corrections.
Improved Fabric Handling: Handles specific fabric types and finishes, preventing issues like fraying and misalignment.
Versatility: Adapts to a wide range of sewing projects, from basic seams to advanced techniques like quilting and embroidery.
Professional Finish: Contributes to a polished and well-finished appearance in garments and projects.
Reduced Fabric Movement: Minimizes shifting and movement, especially in multiple layers or slippery fabrics.
Ease of Use: Features like guides and adjustable settings simplify the sewing process for better results.
What is a Walking Foot?
The walking foot, also known as an even-feed foot, is a specialized accessory that helps manage multiple layers of fabric or tricky materials.
It features a set of feed dogs on the top of the foot, which works in conjunction with the machine’s feed dogs to evenly feed the fabric. This ensures that all layers move together without shifting or puckering.
Types of Walking Foot
Walking feet are designed to handle specific sewing challenges and enhance the functionality of your sewing machine. Here are some common types of walking feet and their uses:
1. Standard Walking Foot
The standard walking foot is the most basic type of walking foot, designed for general use. It helps to feed multiple layers of fabric evenly, making it ideal for quilting and sewing through heavy or slippery materials. This foot typically features a set of feed dogs on top that move in sync with the machine’s feed dogs.
2. Dual Feed Walking Foot
The dual feed walking foot offers enhanced functionality by including an additional set of feed dogs that work independently of the machine’s feed dogs. This type of foot is excellent for handling fabrics with different thicknesses or textures, such as leather or vinyl. It ensures even feeding and minimizes fabric shifting.
3. Walking Foot with Guide
A walking foot with guide includes a built-in guide or edge marker that helps you maintain consistent seam allowances or stitching lines. This type of walking foot is particularly useful for quilting and sewing projects that require precise, evenly spaced stitching.
4. Walking Foot with Quilting Guide
The walking foot with quilting guide features a specialized attachment that assists with quilting tasks. It usually comes with adjustable guides to help you sew straight lines, curves, or decorative patterns with precision. This foot is ideal for quilting intricate designs or for stitching along marked lines.
5. Walking Foot with Free Motion Capability
The walking foot with free motion capability combines the functions of a walking foot with the ability to perform free motion quilting. It typically includes a spring mechanism that allows the foot to move up and down freely, enabling intricate stitching and detailed designs. This type of walking foot is versatile for both quilting and creative sewing techniques.
Advantages of Using a Walking Foot
Even Feeding: Ensures that multiple layers of fabric move simultaneously without shifting or puckering.
Improved Stitch Quality: Provides consistent feeding, resulting in more uniform stitches and a professional finish.
Handles Multiple Layers: Effectively manages sewing through several layers or thick materials, such as denim or quilts.
Reduces Fabric Slippage: Prevents slippery fabrics like silk or satin from sliding around during sewing.
Minimizes Puckering: Helps avoid puckering in fabrics that are prone to distortion, such as knits or delicate materials.
Versatile for Various Projects: Ideal for quilting, sewing heavy fabrics, or handling complex sewing tasks.
Enhances Precision: Improves the accuracy of stitching, especially for intricate designs or detailed quilting patterns.
Increases Sewing Efficiency: Reduces the need for constant fabric adjustments, speeding up the sewing process.
Maintains Fabric Alignment: Keeps layers of fabric aligned, ensuring a neat and tidy appearance in finished projects.
Improves Overall Sewing Experience: Provides smoother and more enjoyable sewing, particularly with challenging fabrics or multiple layers.
Key Differences Between Walking Foot and Presser Foot
While both feet play crucial roles in sewing, their functions are distinctly different. Here’s a breakdown of their primary differences:
Functionality
- Presser Foot: Primarily holds fabric down and can vary in design to accommodate different stitches and techniques.
- Walking Foot: Provides additional feeding mechanisms to handle multiple layers or slippery fabrics, ensuring even movement.
Design
- Presser Foot: Typically has a flat, foot-like design.
- Walking Foot: Features an additional set of feed dogs on top and a bulky appearance to accommodate its feeding mechanism.
Usage
- Presser Foot: Suitable for most standard sewing tasks.
- Walking Foot: Best for quilting, sewing through multiple layers, or working with challenging fabrics.
When to Use a Walking Foot or Presser Foot
Walking Foot
Choosing the right foot can make a significant difference in your sewing project. Here are scenarios where a walking foot excels:
- Quilting: Quilts often involve sewing through several layers of fabric and batting. The walking foot helps to manage this bulk and ensures even stitching.
- Sewing with Knits or Stretch Fabrics: The walking foot prevents stretching or distorting of knit fabrics, leading to more accurate results.
- Handling Multiple Layers: Whether you’re working with heavy fabrics or several layers, the walking foot provides consistent feed, preventing shifting and uneven stitching.
Presser Foot
The presser foot is versatile and can be used in various situations. Here are a few examples:
- Basic Sewing: For everyday sewing tasks, such as sewing seams, the standard presser foot is sufficient.
- Decorative Stitches: Use specialized presser feet like the zigzag or decorative foot for adding embellishments to your projects.
- Hemming and Edging: The blind hem foot is designed for precise hemming, giving a clean, professional finish.
Popular Sewing Machines with Walking and Presser Foot
When selecting a sewing machine, it’s helpful to choose one that supports or includes walking and presser feet. Here are some popular sewing machines known for their versatility and quality:
Popular Sewing Machines with Walking Foot
- Brother PQ1500SL: This high-speed sewing machine is ideal for quilting and heavy-duty sewing. It includes a walking foot and offers a range of features for precise stitching.
- Janome HD3000: Known for its durability and ease of use, this machine comes with a walking foot, making it perfect for quilting and sewing through multiple layers.
- Bernina 770 QE: A top choice for quilters, this machine features a walking foot and advanced sewing capabilities, including a large stitch area and numerous stitch options.
Popular Sewing Machines with Presser Foot
- Singer 4423 Heavy Duty: This machine includes various presser feet, including a standard foot, zigzag foot, and buttonhole foot, making it suitable for a range of sewing tasks.
- Janome 2212: A user-friendly machine with a standard presser foot and additional options for different sewing techniques, ideal for beginners and casual sewists.
- Pfaff Creative Icon: This high-end machine offers a variety of presser feet and advanced features, including a built-in walking foot, making it suitable for professional sewing and quilting.
How to Attach and Use Walking or Presser Foot
Attaching the Presser Foot
- Remove the Existing Foot: Most sewing machines have a lever or button to release the current foot.
- Align the New Foot: Position the presser foot so that it aligns with the machine’s foot holder.
- Secure the Foot: Lower the foot and ensure it snaps into place or is secured with a screw, depending on your machine model.
Attaching the Walking Foot
- Remove the Existing Foot: Similar to the presser foot, release the current foot.
- Attach the Walking Foot: Align the walking foot with the machine’s foot holder, ensuring the feed dogs on top are correctly positioned.
- Adjust the Height: Some walking feet allow for height adjustment to ensure proper feeding.
Tips for Effective Use
- Test Stitches: Before starting your project, test your stitches on a scrap piece of fabric to ensure the settings are correct.
- Adjust Tension: Fabric thickness can affect stitch tension, so make necessary adjustments for optimal results.
- Maintain Your Feet: Keep your presser and walking feet clean and free of fabric lint to ensure smooth operation.
Common Issues and Solutions
Issues with Presser Foot
- Fabric Slippage: Ensure the presser foot is properly adjusted and that the feed dogs are functioning correctly.
- Uneven Stitching: Check if the presser foot is aligned correctly and the machine’s tension settings are accurate.
Issues with Walking Foot
- Sticking or Jamming: Ensure the walking foot is correctly attached and that the feed dogs are not obstructed by lint or fabric.
- Uneven Feeding: Adjust the walking foot’s height if it’s not feeding the fabric evenly.
Final Thoughts
Understanding the differences between the walking foot and the presser foot is crucial for any seamstress looking to enhance their sewing projects. Each foot serves a unique purpose and can significantly impact the quality of your work.
The presser foot is a staple for general sewing, while the walking foot is indispensable for handling multiple layers and challenging fabrics.
By choosing the right foot for your project and using a sewing machine that supports these essential accessories, you can achieve professional results and enjoy a smoother sewing experience.
Remember to keep your tools well-maintained and adjust them according to your fabric and project needs for the best outcomes.