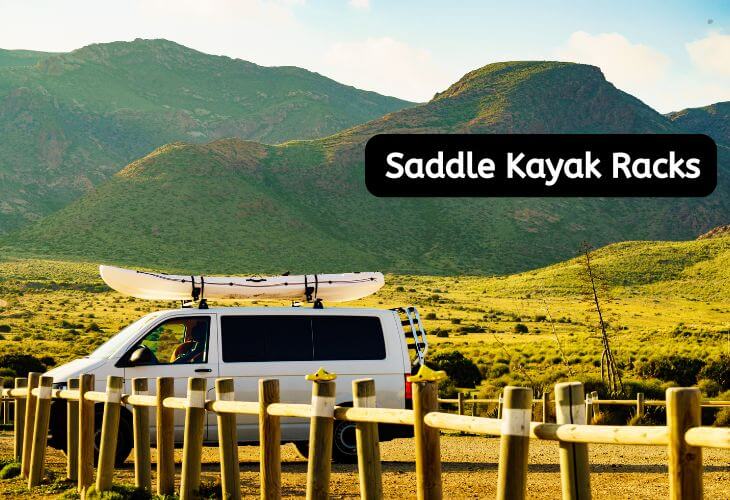
A saddle kayak rack is your trusty companion for kayak transportation. Think of it as a cozy cradle for your beloved boat. These sturdy racks feature curved supports that perfectly match your kayak’s hull shape.
You might wonder why you need a specialized rack. Let me paint you a picture. Picture yourself cruising down the highway with your kayak wobbling above. Scary, right? That’s exactly why proper transportation matters.
Why do so many paddlers swear by saddle racks? The answer lies in their smart design. These racks distribute weight evenly. They keep your kayak stable. They protect your boat’s hull. Most importantly, they give you peace of mind during transport.
In kayaking adventure, I wish someone had told me about saddle racks sooner. Your kayaking journey deserves better than rope-and-prayer transport solutions.
So, are you ready to discover how saddle kayak racks can transform your paddling adventures? Let’s explore the features that make these racks a game-changer for every kayaking enthusiast.
Types of Saddle Kayak Racks
Now, ready to break down the different types of saddle racks that’ll make your kayak transportation dreams come true.
J-Style Saddles
Ever noticed those J-shaped racks on other cars? These are my personal favorites! J-style saddles carry your kayak on its side. This design saves precious roof space.
Want to know the sweetest part? You can typically fit 2-3 kayaks on your roof with J-style racks.
Horizontal Saddles
Looking for maximum stability? Horizontal saddles might be your perfect match. These cradle your kayak in its natural position. These babies can keep your boat steady through three thunderstorms!
Stackers
Got multiple kayaks? Stackers are your new best friends. These vertical systems let you transport several kayaks upright. Think of them as your roof-top kayak parking garage!
Pro tip: Stackers are great for family trips. They can easily handle four kayaks like champions.
Adjustable Saddles
Here’s my absolute favorite! Adjustable saddles offer ultimate flexibility. You can modify:
- The width
- The angle
- The height
Don’t you love gear that adapts to your needs?
Which Type Is Right for You?
Ask yourself these questions:
- How many kayaks do you need to transport?
- What’s your vehicle’s width?
- Do you prefer side-loading or rear-loading?
- What’s your budget range?
“The right rack makes the journey as enjoyable as the destination!”
Ready to dive deeper into the features that make each type special? Stick around for my next section!
Key Features of Saddle Kayak Racks
In this section I’m here to spill the tea about those must-have features in saddle kayak racks.
Padded Contact Points
Worried about scratches on your precious kayak? Those rubber padding points are your boat’s best friends! Your first kayak could end up with battle scars from an unpadded rack. Trust me, you don’t want that experience.
The padding offers:
- Hull protection
- Vibration reduction
- Noise minimization
Adjustable Straps and Mounts
Let’s talk about straps! You know that secure feeling when everything clicks just right? Quality saddle racks come with heavy-duty straps. They include:
- Quick-release buckles
- Weather-resistant webbing
- Multiple adjustment points
Weather-Resistant Materials
Have you checked your rack’s material lately? Weather resistance matters more than you think. Look for:
- Powder-coated metal
- UV-protected components
- Rust-resistant hardware
Did you hear those stories about rusty racks? Let’s just say that lesson is always learned the hard way. I want, you won’t.
Universal Mounting Systems
Guess what makes a great rack even better? Universal compatibility! Your rack should fit:
- Factory crossbars
- Aftermarket bars
- Round bars
- Square bars
These gears will prepare you for any adventure.
Load Capacity Specifications
Here’s something crucial: weight limits! Every rack has one. My top tips:
- Check your kayak’s weight
- Factor in wet weight
- Consider future upgrades
Quick Question Time:
- What features matter most to you?
- Have you ever wished for a feature your current rack doesn’t have?
P.S. Want to know my absolute must-have feature? It’s those quick-release straps. Nothing beats a swift getaway when storm clouds gather!
Remember: Sometimes the best features are the ones you don’t notice until you need them. Just like that backup paddle!
Benefits of Using Saddle Kayak Racks
Here again with some exciting perks of saddle kayak racks that’ll make you wonder how you ever lived without one!
Enhanced Vehicle Aerodynamics
On long trips, saddle racks prove their worth by creating less drag than traditional carriers. Your kayak sits pretty at the perfect angle, making the wind work with you instead of against you. The result? Smoother travel and better fuel efficiency. The wind becomes your friend instead of your enemy!
Reduced Fuel Consumption
Speaking of fuel – let’s talk numbers! We can say:
- Up to 15% better fuel efficiency
- Less wind resistance
- Smoother driving experience
It enhances efficiency along with significantly reduces expenses, ensuring long-term savings and improved financial outcomes.
Better Stability During Transport
Can you imagine driving without worrying about your kayak? Rock-solid stability is what you get! This saddle rack keeps kayak:
- Steady in crosswinds
- Stable during sudden stops
- Secure on mountain roads
Protection for Kayak Hull
Your kayak’s hull deserves love! Here’s what proper saddle support offers:
- Even weight distribution
- No pressure points
- Protected contact zones
Trust me – your kayak will thank you after each journey.
Easy Loading/Unloading
Remember struggling with your kayak alone? Those days are over! Saddle racks offer:
- Single-person loading
- Ergonomic design
- Simple lift-and-lock system
Successfully loading a 14-foot kayak without any assistance brings a whole new level of independence and convenience. It eliminates the need for extra hands, streamlines preparation, and opens the door to spontaneous adventures on the water anytime.
Multiple Kayak Transport
Got kayaking buddies? Most saddle systems let you carry:
- 2-3 kayaks safely
- Different sized boats
- Various hull shapes
Pro Tips:
- Always check strap tension
- Position wider hulls toward the car’s center
- Test your setup in an empty parking lot
Here’s a game-changing tip: keeping a small step stool in the car. It’s perfect for shorter paddlers and makes loading and unloading a breeze. The best part? It brings peace of mind, eliminating any worries about kayak shifting on the road.
Installation and Setup Guide
Ready to break down the installation process. Feeling overwhelmed? Don’t be! Pour yourself a coffee, and let’s tackle this together.
Essential Tools You’ll Need
First up, let’s raid that toolbox! Here’s your must-have list:
- Allen wrench set (most racks use 4mm, 5mm, and 6mm)
- Measuring tape (at least 25 feet)
- Socket wrench set with extensions
- Bubble level (trust me, you’ll thank me later!)
- Clean microfiber cloths
- Torque wrench (my game-changing discovery!)
- Rubber mallet (for gentle persuasion)
- Pencil or painter’s tape for marking
Pro tip: A dedicated “kayak toolkit” can make life so much easier!
Step-by-Step Installation Process
1. Preparation Phase
Before you touch a single bolt, let’s get ready:
- Clean those crossbars thoroughly
- Remove old mounting hardware
- Measure your kayak’s width
- Lay out all parts on a blanket (prevents lost pieces!)
- Take photos of your current setup if replacing old racks
Most installation issues stem from inadequate preparation, leading to unexpected difficulties during execution.
2. Crossbar Setup
Let’s get those bars ready:
- Measure your crossbar spread
- Most kayaks need 24-36 inches between bars
- Mark your positions with painter’s tape
- Double-check measurements
- Position your bars
- Front bar: Usually 1/3 from vehicle front
- Rear bar: Check your kayak’s weight distribution
- Level check (this is crucial!)
A wobbly rack is a reminder that precision matters. Always use a level for stable results.
3. Mount Assembly Installation
Here’s where it gets interesting:
- Base Clamp Attachment
- Clean mounting points
- Apply any rubber padding
- Hand-tighten bolts first
- Torque Settings
- Start at 50% recommended torque
- Check alignment
- Final torque in star pattern
- Mark final position with paint pen
Over-tightening can be just as harmful as under-tightening, resulting compromised performance and potential failure of components. While under-tightening can result in loose connections that may cause instability, over-tightening puts undue stress on materials, increasing the risk of damage, deformation, or breakage.
4. Saddle Installation
Now for the fun part:
- Position your saddles
- Center on crossbars
- Check spacing with your kayak
- Align front and rear saddles
- Adjustment and Testing
- Test movement range
- Check clearance
- Verify locking mechanisms
Vehicle-Specific Considerations
Let’s talk compatibility:
- Crossbar Types
- Factory bars
- Aftermarket rounds
- Square bars
- Aero bars (a favorite one!)
- Weight Limits
- Check vehicle manual
- Verify rack capacity
- Consider wet kayak weight
Safety Checklist
Before you hit the road:
- ✅ All bolts torqued properly
- ✅ Saddles move smoothly
- ✅ No interference with doors/sunroof
- ✅ Load height clearance verified
- ✅ Test fit with kayak
Pro Installation Tips
- Weather Matters
- Install on a dry day
- Avoid extreme temperatures
- Good lighting is crucial
- Helper Tips
- Get a spotter for measurements
- Use your phone’s level app as backup
- Take installation photos
- Testing Protocol
- Load test in driveway
- Short test drive recommended
- Check tightness after first use
Troubleshooting Common Issues
Having problems? Check these first:
- Uneven Saddles
- Recheck measurements
- Verify crossbar level
- Check for debris
- Loose Fittings
- Inspect lock washers
- Verify correct bolt size
- Check torque settings
Always take your time with installation. A rushed job means roadside repairs later. We don’t want that!
Saddle Kayak Rack Maintenance and Care
Let’s dive deep into keeping your rack in tip-top shape. I’ve got the inside scoop on what really works.
Daily Quick Checks (Pre/Post Trip)
You know that feeling when something just doesn’t feel right with your rack? Trust that instinct! Before any adventure, taking five minutes for a quick once-over ensures readiness.
Running your hands along the straps helps you feel any concerning wear spots. Give those saddles a gentle wiggle – they should move smoothly but not loosely.
Before you hit the road, always check:
- Strap tension (give them a firm tug)
- Saddle movement
- Visible rust or damage
- Loose components
Pro tip: Keep a small flashlight in my car for those early morning inspections!
Weekly Detailed Inspection
Sunday mornings offer the perfect opportunity for rack maintenance. Fresh coffee in hand, music playing, and quality time with your gear. Start at the front of your vehicle and work your way back methodically. Those bolts need your attention – each one should be snug but not overtightened.
A slightly loose bolt can become a major headache midway through your trip. Use the “finger-tight plus a quarter turn” rule for most bolts. Your rack’s manual will give you the exact torque specifications.
Set aside 15 minutes for:
- Bolt Inspection
- Check every single bolt
- Look for rust formation
- Test movement in joints
- Verify torque settings
- Strap Assessment
- Check for fraying
- Test buckle function
- Verify strap alignment
- Clean any debris
- Padding Examination
- Look for compression
- Check adhesion
- Inspect for UV damage
- Clean contact points
Comprehensive Cleaning Guide
Let’s talk about cleaning – it’s not just about aesthetics. Salt, road grime, and environmental debris can seriously impact your rack’s longevity. Beach camping teaches a tough lesson, salty air can severely damage metal components.
Start with a gentle rinse to remove loose debris. You can use the same car wash soap you use on your vehicle – anything harsher risks damaging the protective coatings.
A soft microfiber cloth works wonders for general cleaning, but don’t forget those hidden nooks and crannies! My secret weapon? An old toothbrush designated specifically for rack cleaning.
Basic Cleaning (Weekly)
Required Materials:
- Mild car wash soap
- Microfiber cloths
- Soft bristle brush
- Clean water
- Towels for drying
Process:
- Initial rinse
- Apply soap solution
- Gentle scrubbing
- Thorough rinse
- Complete drying
Deep Cleaning (Monthly)
Step 1: Preparation
- Remove all removable parts
- Label parts if necessary
- Photograph assembly
- Gather cleaning supplies
Step 2: Detailed Cleaning
- Metal Components
- Use metal cleaner
- Remove oxidation
- Apply rust inhibitor
- Check for damage
- Plastic Parts
- Use plastic cleaner
- Check for UV damage
- Apply protectant
- Verify flexibility
- Rubber Components
- Clean with mild soap
- Check for dry rot
- Apply rubber conditioner
- Test resilience
Seasonal Maintenance Magic
Each season brings its own maintenance challenges. Spring calls for a thorough revival after winter storage. Spend a good afternoon doing a complete disassembly, inspection, and reassembly. Think of it as a spa day for your rack!
Summer requires extra attention to UV protection. Those harsh rays can degrade plastic components and weaken straps faster than you’d expect. Use UV-protective sprays: help prevent straps from becoming brittle, even during intense summer conditions.
Fall is all about preparation for storage or winter use. Any hint of rust needs addressing before winter moisture makes it worse. A good rust converter and protective coating can save you from replacing parts come spring.
Seasonal Maintenance Schedule
Spring Prep (March-April)
- Post-Winter Inspection
- Complete disassembly
- Thorough cleaning
- Parts replacement
- Rust treatment
- Assembly Check
- Torque verification
- Movement testing
- Alignment check
- Load testing
Summer Maintenance (May-August)
- Weekly cleaning
- UV protection
- Strap conditioning
- Bolt checks
Fall Preparation (September-October)
- Pre-Storage Prep
- Deep cleaning
- Rust prevention
- Part lubrication
- Damage repair
- Documentation
- Photo inventory
- Maintenance log
- Part numbers
- Replacement needs
Winter Storage (November-February)
- Climate-controlled space
- Proper positioning
- Monthly checks
- Cover protection
Storage Secrets
Winter storage deserves special attention. You should convert a corner of my garage into a dedicated rack storage space. Your rack needs a cool, dry environment – not that damp basement corner.
Before storage, apply a light coat of moisture-displacing lubricant to metal parts. This creates an invisible shield against rust during those humid storage months.
Advanced Maintenance Tips
Metal Care
- Preventing Corrosion
- Regular waxing
- Sacrificial anodes
- Moisture prevention
- Touch-up paint
- Rust Treatment
- Early detection
- Proper removal
- Surface treatment
- Protective coating
Strap Maintenance
- UV Protection
- Regular treatment
- Rotation schedule
- Backup straps
- Storage methods
- Buckle Care
- Lubrication
- Salt removal
- Function testing
- Replacement timing
Emergency Preparedness
Keeping an emergency kit in the vehicle is essential to handle unexpected situations, such as a failed rack component problem. It’s nothing fancy – just some basic tools, spare straps, and zip ties. You’d be amazed how often these simple items save the day, not just for me but for fellow paddlers I meet on the road.
Emergency Repairs
Roadside Kit Contents:
- Multi-tool set
- Spare straps
- Emergency tape
- Basic tools
- Zip ties
- Quick-dry lubricant
Common Emergency Fixes:
- Loose Bolts
- Temporary tightening
- Thread check
- Lock washer use
- Torque limits
- Strap Issues
- Emergency replacement
- Quick fixes
- Load redistribution
- Safety checks
Think of your rack maintenance like preparing for a paddling trip – it’s all about prevention and preparation. Canceling weekend trips due to poor rack maintenance becomes a thing of the past! A well-maintained rack is your ticket to worry-free adventures. So, prepare your own maintenance routine and get to work.
Pro Tips
- Documentation
- Keep maintenance logs
- Store receipts
- Photo records
- Part numbers
- Preventive Care
- Regular inspections
- Early intervention
- Quality products
- Professional checks
Buying Guide for Saddle Kayak Racks
Now, we’ll guide you through the exciting (and sometimes overwhelming) world of kayak rack shopping. Grab your favorite beverage, and let’s talk about making that perfect rack choice.
Understanding Your Budget
Choosing the most inexpensive option might seem cost-effective initially, but it often leads to compromises in quality, increasing the likelihood of requiring a replacement within a few months, ultimately adding to long-term expenses and inconvenience. Here’s the truth about rack budgeting:
Entry-Level Racks ($100-200) Perfect for occasional paddlers. These will get you started, but don’t expect all the fancy features. These worked just fine for monthly trips.
Mid-Range Options ($200-400) Now we’re talking! This is where I currently live. You’ll find better materials, easier adjustments, and those lovely padded touch points. Worth every penny for regular paddlers.
Premium Selections ($400+) The cream of the crop! These beauties offer superior aerodynamics, advanced security features, and usually lifetime warranties. You can splurge on one if you’re looking to experience a cross-country kayaking adventure.
Vehicle Compatibility Magic
There are always challenges when it comes to vehicle compatibility. Take the attempt to fit a J-style rack on a Mini Cooper—let’s just say it didn’t go as planned. Here’s what you need to consider:
Roof Type Considerations Your vehicle’s roof setup matters more than you might think. Are you working with:
- Naked roof? You’ll need a complete system
- Factory rails? Extra components might be necessary
- Aftermarket crossbars? Check those weight limits
Pro tip: Take photos of your roof setup before shopping. Trust me, it saves those awkward return trips!
Size Really Does Matter
Kayak measurements play a crucial role in ensuring compatibility with rack setups. A touring kayak that is too long for a rack can create significant challenges, especially during transportation.
Proper planning and alignment between kayak dimensions and rack capacity help avoid such issues, ensuring both safety and convenience on the road. Consider:
Width Factors Your kayak’s beam width affects rack choice. A 28-inch wide recreational kayak needed different support compared to a sleek 22-inch touring boat.
Length Considerations Got a 14-foot kayak? You’ll need different support than someone with a 9-foot recreational boat. A golden rule: measure twice, buy once!
Usage Patterns Matter
Be honest with yourself about your paddling habits. Are you:
- A weekend warrior?
- Daily paddler?
- Long-distance adventurer?
- Multiple kayak hauler?
Starting as a weekend warrior can quickly evolve into becoming a dedicated paddler. Usage patterns tend to shift and grow over time.
Weather Warriors
Here’s something many folks forget – weather resistance! Live in Michigan? Then the importance of rust-resistant materials becomes clearer than ever. Consider your local climate:
Coastal Paddlers Salt air is brutal on metal components. Look for marine-grade materials. For example: Florida kayaking friends swear by anodized aluminum.
Mountain Adventures High altitude UV exposure needs serious consideration. Premium protective coatings become essential here.
Four-Season Users If you’re paddling year-round (you brave soul!), invest in weather-sealed components.
Future-Proofing Your Purchase
Think about your kayaking future! Ask yourself:
- Planning to upgrade your kayak soon?
- Might you need to carry multiple boats?
- Considering a different vehicle?
Personal Test
Before any purchase, you run through the following checklist:
- Can I lift my kayak onto this rack solo?
- Does it fit my current AND future needs?
- Will it last through my planned adventures?
- Does it make that satisfying ‘click’ when locked? (Yes, I’m serious about this one!)
Want to know what’s my take? A mid-range adjustable saddle system. It handles everything from recreational kayak to touring boat adventures, and you can load it yourself (even after a long paddle day!).
Questions to Ask Before Buying
- Does the warranty cover your usage type?
- Are replacement parts readily available?
- How’s the customer service reputation?
- Does it come with all necessary components?
Essential Safety Tips for Saddle Kayak Rack Adventures
Saddle kayak racks offer a convenient way to transport kayaks, but safety is paramount. Following essential tips ensures the kayak stays secure, preventing accidents and making every adventure smooth and stress-free from start to finish.
Proper Strapping Techniques: The Heart of Security
During a long-distance trip, the importance of securely strapping down a kayak became evident. Despite previous confidence in the technique, unexpected challenges from weather conditions highlighted the need for more reliable methods.
The Three-Point Rule Always secure your kayak at these crucial points:
- Bow line (my absolute must-have!)
- Stern line
- Center straps
Here’s my secret sauce: Use a distinctive bright orange bow line. Why? It helps spot-check the setup in side mirrors while driving.
Load Distribution Magic
Proper weight distribution on a kayak rack is essential for safe transport, preventing damage to the kayak, and ensuring vehicle stability during travel. Your kayak should:
- Sit centered on your saddles
- Have equal weight on both sides
- Rest firmly against all contact points
Pro tip: Place you hand under each saddle point and feel for equal pressure. Trust those instincts!
Pre-Journey Checks That Save Lives
You know that pre-trip excitement? Channel it into these crucial checks:
- Strap Tension Test Give each strap a firm tug. They should be tight but not warped.
- Movement Check Your kayak shouldn’t shift more than an inch in any direction.
- Bow and Stern Line Inspection These are your backup safety nets – make them count!
- Hardware Review All bolts and clamps should be snug.
- Final Walk-Around Trust your gut – if something looks off, it probably is.
Highway Driving Wisdom
The first highway trip with a kayak can feel daunting, but over time, it becomes effortless with the right habits in place:
Speed Considerations
- Stay under 65 mph (I know, the temptation is real!)
- Maintain steady speed
- Avoid sudden movements
Weather Awareness Remember my crosswind adventure in Wyoming? Now I always:
- Check weather forecasts
- Plan for wind exposure
- Adjust driving style accordingly
Emergency Response Plan
Stay prepared with a quick response kit:
- Extra straps (my lifesavers!)
- Basic tool set
- Emergency phone numbers
- Local rack dealer contacts
The Sound Check Method
Here’s something quirky but effective: listen to your rack. Seriously! Different sounds mean different things:
- Whistling? Check strap tension
- Clunking? Inspect saddle movement
- Creaking? Time for a bolt check
Height Clearance Adventures
Understanding overhead limits prevents accidents, protects your equipment, and ensures smooth travel. Prioritize safety by checking clearances before every trip.
- Know your total vehicle height
- Write it on a sticky note
- Watch for low branches
Want to know some never-fail safety routine?
- Morning Check Ritual Start each trip with a fresh inspection.
- Rest Stop Protocol Quick walk-around at every stop.
- Weather Watch Plan routes around severe weather.
- Trust Your Gut If something feels off, it probably is!
Marking strap positions with tiny pieces of colored tape provides an easy way to spot any shifts during travel. These small tricks can make a significant difference.
Wrapping It Up: Your Journey to Saddle Rack Success
Wrapping up our deep dive into the world of saddle kayak racks. What a journey we’ve been on together, right?
Throughout this guide, we’ve covered everything from choosing your perfect rack to keeping it in tip-top shape. Starting with a basic rack on an old Honda has evolved into discussions about advanced safety features and maintenance schedules.
The beauty of modern saddle racks? They’re incredibly versatile! Whether you’re rocking a sleek touring kayak or a chunky recreational boat, there’s a perfect setup waiting for you.
Struggling with basic straps becomes a thing of the past with the discovery of proper saddle systems, bringing unmatched convenience and comfort.
Want to know what excites me most about kayak rack technology? The constant innovations! From improved aerodynamics to better materials, we’re seeing some amazing advances.
A good saddle rack isn’t just a purchase – it’s an investment in your paddling future. I can honestly say that investing in a quality saddle rack changed your kayaking life. No more loading struggles, no more highway anxiety, just pure paddling joy.
Your Next Steps
Feeling ready to tackle your rack journey? Here’s what I want you to remember:
- Trust your research
- Prioritize safety
- Don’t rush your decision
- Stay connected with our paddling community